

There comes a time in every guitarist’s life when they need to change one or all of their guitar strings.
If you’re new to guitar and not overly familiar with how to change guitar strings, then it might seem a little daunting. Or maybe you’ve changed your guitar strings for years but just want to read up on how you can improve the process.
In any case, this guide to stringing a guitar will go over everything you need to know, step-by-step, for changing your acoustic guitar strings.
Let’s get into it.
4 Ways to Make Your Guitar Strings Last Longer
Let’s face it, changing guitar strings isn’t the most fun thing to do. It takes time, costs money, and I’m sure you’d much rather be playing or learning how to play your guitar.
So, for those of you who want to prolong the life of your guitar strings, here are 4 things you can do.
1. Wipe Down Your Strings/Fretboard After Every Use
Doing this will help prolong the life of your strings by helping to prevent grime from building up and rust from forming.
To do this, you can simply use a cloth or a dedicated guitar string cleaner.
2. Wash Your Hands Before Playing
This goes “hand-in-hand” (pun intended) with the tip mentioned above.
Washing your hands helps reduce the amount of oil and grime that builds up on your guitar’s strings and fretboard. Thus helping to prolong the life of your strings.
3. Buy Higher-Quality Strings
Certain string manufacturers sell guitar strings that last longer.
Take Elixir’s Nanoweb-coated strings for instance. This string manufacturer uses a protective coating around their strings in order to prolong their life.
Elixir says that this coating helps extend the life of their strings by 3-5 times. I can attest that these do last much longer than other string brands.
4. Keep Your Guitar in a Case
Ensuring that your guitar is placed in a case and properly humidified will help protect it against environmental factors including humidity, dust, etc.
Recommended Reading: 8 Guitar Care and Maintenance Tips to Always Follow
How Often Should Guitar Strings be Changed?
The answer to this question is quite variable depending on how much you actually play your guitar.
Someone who gigs frequently may change their strings on a bi-weekly basis whereas someone who just picks up the guitar every few days may not have to change their strings for a couple of months.
However, assuming you play an hour a day, a good rule of thumb is to change your strings every 4-6 weeks. Whenever you start to feel that your strings don’t sound as full and crisp as they used to or they don’t feel as smooth on your fingers, then it’s probably time to change your strings.
List of Supplies You’ll Need
When changing your guitar strings, I recommend having the following list of supplies handy.


Once you’ve got all of your supplies ready, it’s time to start changing the guitar strings.
Steps to Stringing a Guitar
Below, I’ve outlined my step-by-step process for stringing a guitar (in this case, an acoustic guitar). Follow each step carefully and you’ll have a fully restrung guitar in no time.
Step 1
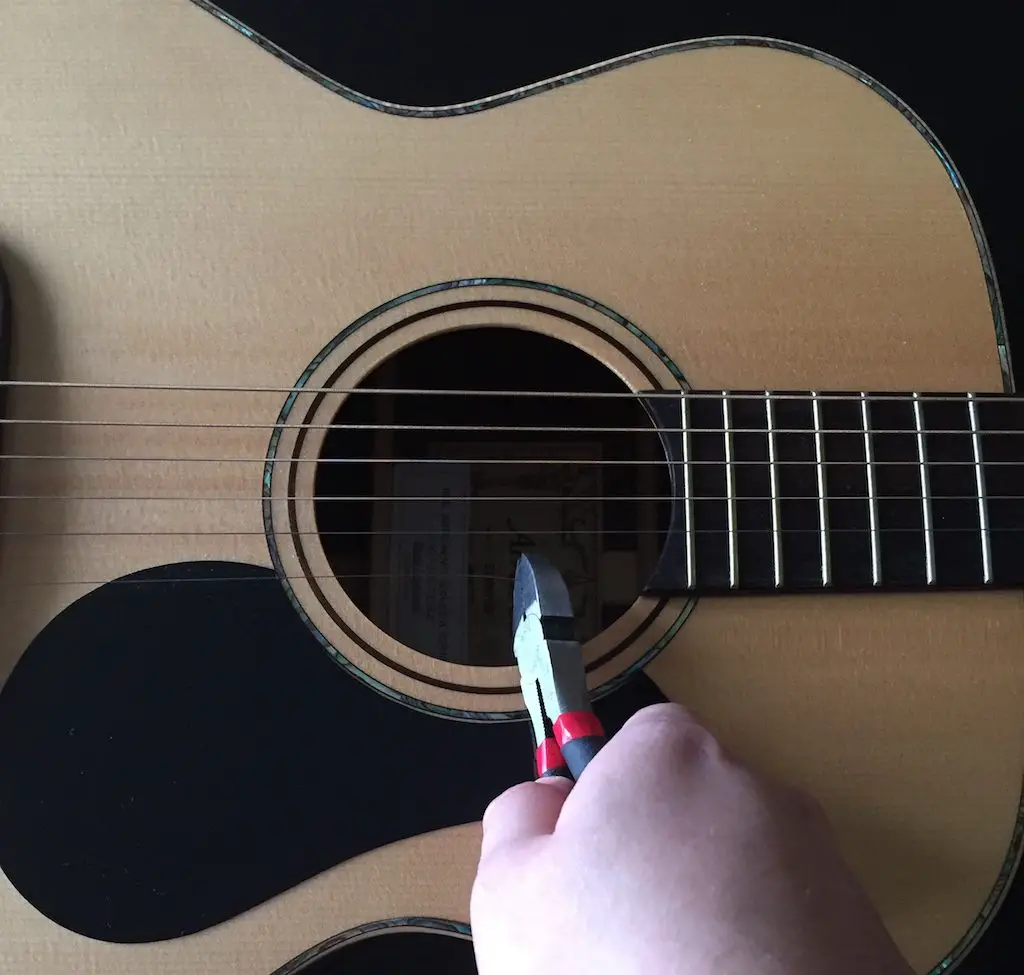
The first step in the guitar string-changing process is to remove all of the strings currently on the guitar. To do this, start by using your string winder tool and loosening the strings.
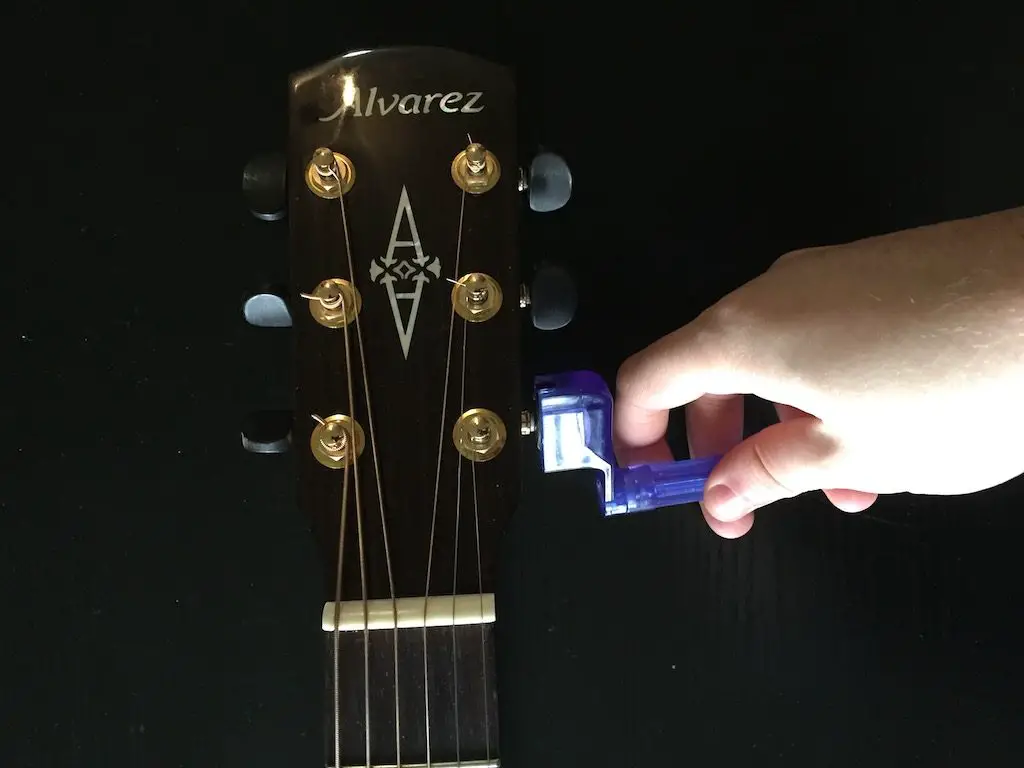
Once they’re nice and loose, use your wire cutter and cut the string at the soundhole. Then remove the string piece from the tuning post.
Step 2
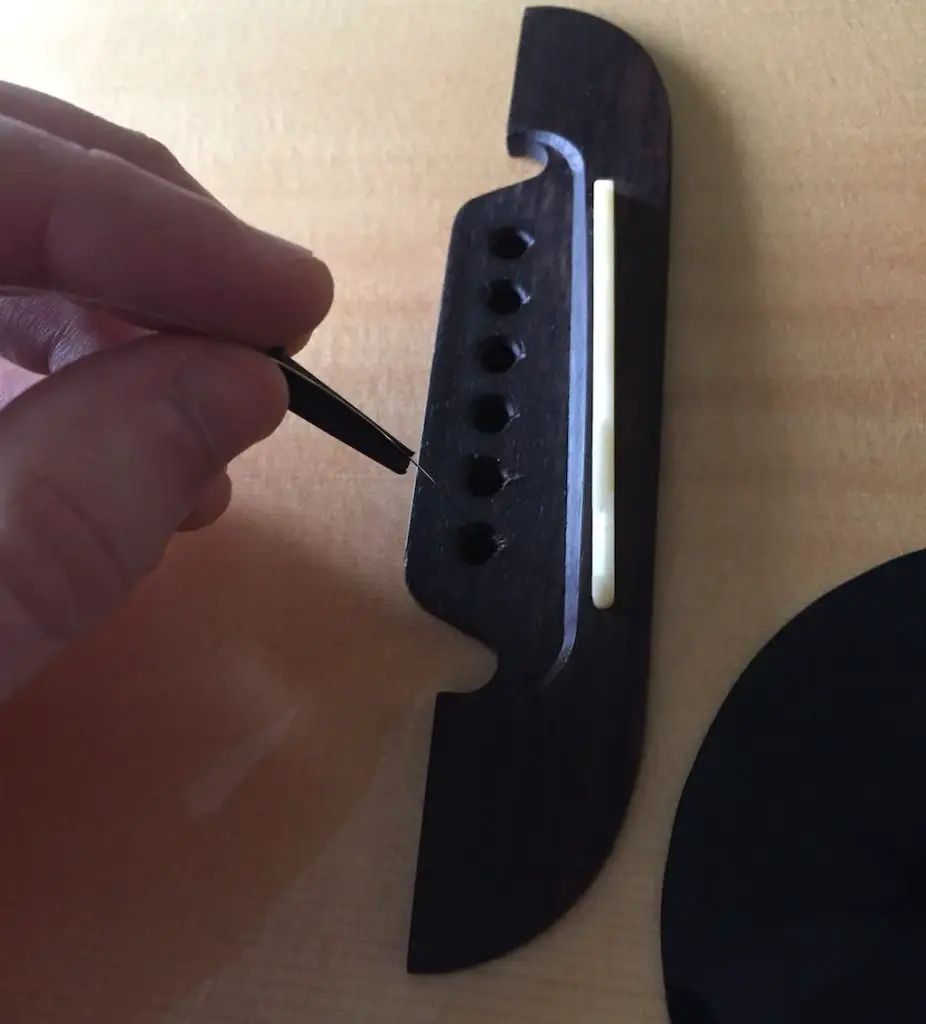
Next, you want to remove the piece of the guitar string that is inside the bridge peg. Your string winder tool will have a handy cutout that you can slide into the bottom of the peg in order to remove it.


When removing your bridge pegs, set them aside in order so that when it comes time to put them back in, each one will go where it previously was.
Simply repeat this step for all of your guitar strings. Once done, you can move on to cleaning the entire guitar.
Step 3
Now that all of your guitar strings are removed from the guitar, it’s time to clean it. The most important part of the guitar to clean is the neck. This part of the guitar collects the most grime and dirt. To clean your guitar’s neck, use the Dunlop lemon fretboard cleaner.
Only use lemon cleaner if your neck is made of rosewood.
To apply the solution, simply dab the applicator on each fret and then wipe it off with a cloth (applying a fair amount of pressure).


You can also apply a bit of the lemon fretboard cleaner to your guitar’s bridge as well to help keep it healthy (as long as it is also made of rosewood).

The last part of the cleaning process is to take the Dunlop polish solution and spray the body of your guitar then wipe it down with a cloth. You can also apply this to your guitar’s headstock.

Step 4
Now that your guitar is all nice and clean, it’s time to start putting on the new guitar strings. This time I decided to use the Elixir Phosphor Bronze strings (I’m a big fan of these).
Remove the strings from the package and order them from thinnest to thickest (there should be a legend on the back of the string packaging).

Start with the thinnest string you have (in my case the .012). Put the ball end side of the string into the bridge pin hole and then take the bridge pin that previously fit in that hole and place it inside the hole.
You’ll notice that the bridge pin has a cutout on one side, ensure that the cutout is facing toward the bridge when placed inside the hole and that the string lives within this cutout section.
Once the bridge pin is in place inside, pull up on the string to ensure there is no slack between the string’s ball end and the bottom of the bridge pin.
Step 5
Now it’s time to wrap your guitar strings around the tuning posts. Take the string and run it all the way down to the tuning post that it corresponds to. We’re going to pre-cut the string to the right size so that when we’re winding the string there isn’t a bunch of extra slack.
To do this, measure out the string 1 and a half tuning posts from the one it should be wrapped around. For example, the length at which you should cut the high E string should be between the second and third tuning posts.

Thread the string through the peg from the center of the headstock and start winding the machine head in the direction for which you tune up the bottom three strings of a guitar. If your bridge peg starts to pop out when tuning up the string, don’t worry about it, just press it back down into place.
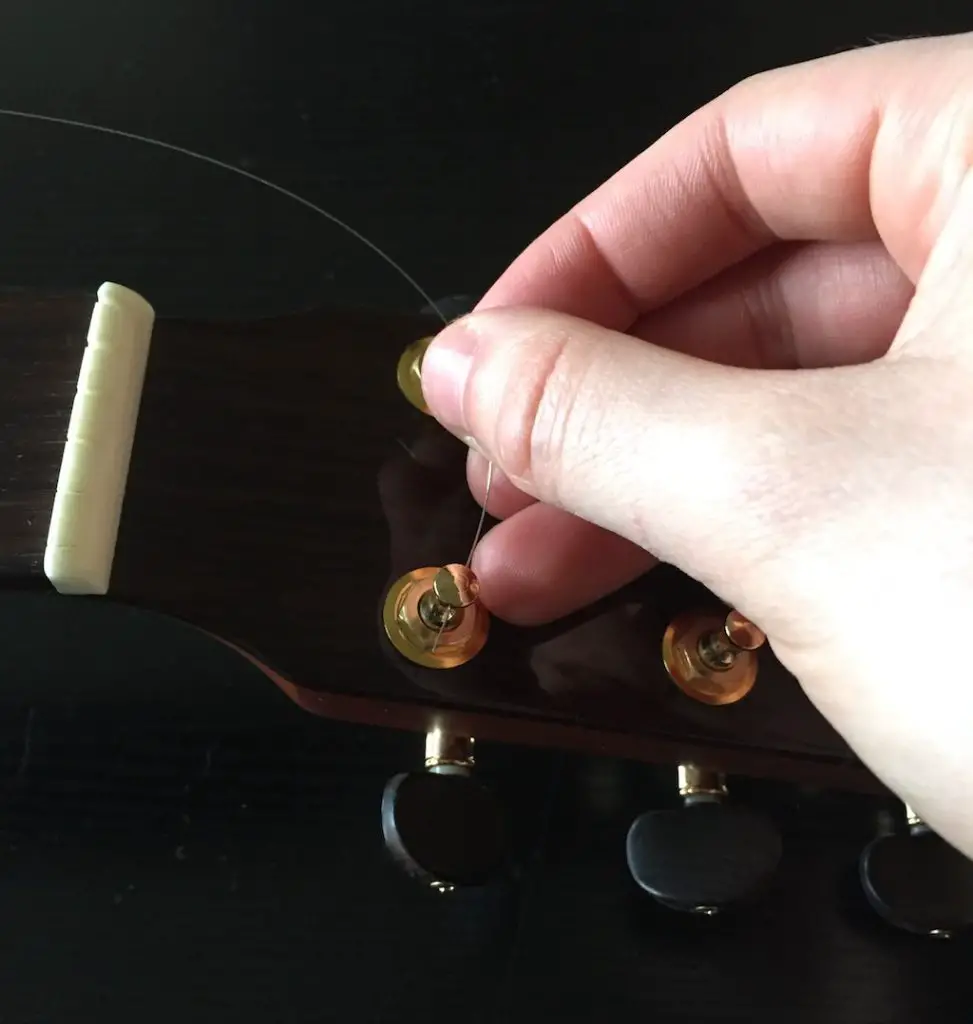
When looking at a guitar from the common viewpoint of it being placed on your lap (and given you are right-handed) the 3 bottom tuning pegs should rotate clockwise in order to tune them up. However, the 3 top pegs should be rotated counter-clockwise in order to be tuned up.
Step 6
Repeat step 5 for each string on your guitar. Remember to wind the top 3 strings of your acoustic guitar in the opposite direction of the bottom 3 strings.
Step 7
Once your strings are all on the guitar, it’s time to tune it up. Take your favorite guitar tuner and tune up all of your strings to the correct tuning.
This can be a little tricky sometimes for new players as they might not know which octave the tuning should be in. In this case, try playing the strings of another guitar you have lying around and match its tuning.
A lot of guitar tuners nowadays also allow you to hear the note you want to tune to. If you feel that you’re turning the pegs too far and that a string might break, stop tuning and come back to it in a couple of minutes once the string has had time to stretch out a little bit.
Step 8
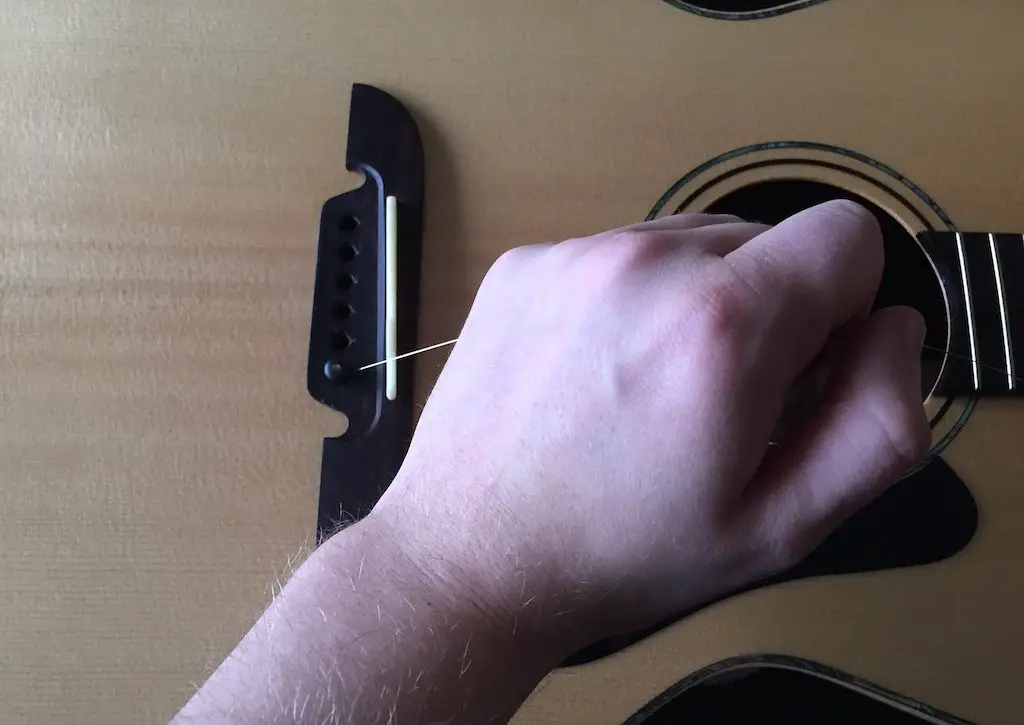
The last part of stringing a guitar is to stretch out each string manually. When you first put on a new set of strings, they’ll go out of tune fast. That’s because they need to be stretched out.
To help speed up this process, take a couple of fingers, place them under one of your strings, and slightly pull upwards.
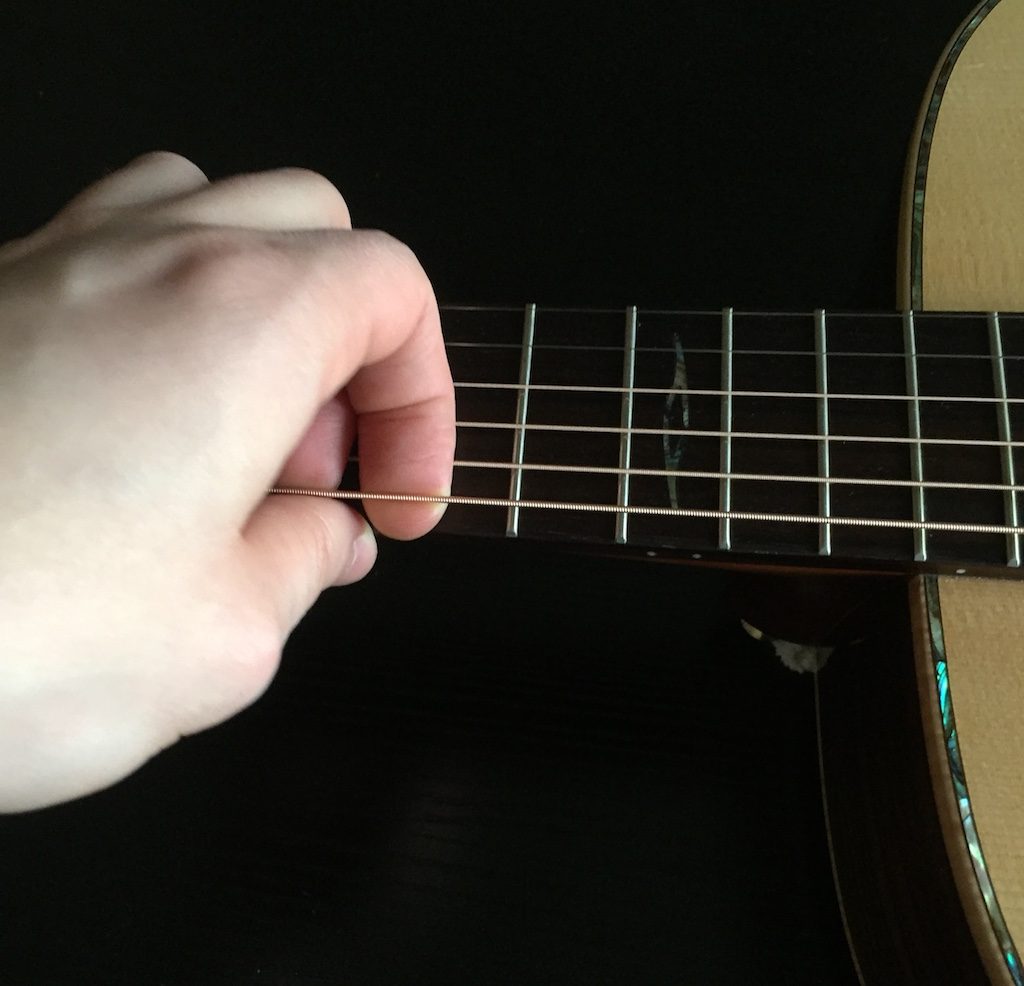
Do this a couple of times all along the string, from the bridge to the headstock of your guitar.
Now that your strings are stretched out they’ll all be out of tune again so just tune them back up to standard tuning and voilà you’ve got yourself a guitar with a brand new set of strings on it.
Final Thoughts
There are certainly a few tricks involved in doing it right and efficiently.
Another great tool that you can use to restring a guitar even faster is Roadie.
This automatic tuner not only tunes your guitar for you but also has a handy wind / unwind feature that allows you to quickly change your strings.


0 Comments